Basic Portals: Difference between revisions
No edit summary |
No edit summary |
||
| (7 intermediate revisions by the same user not shown) | |||
| Line 1: | Line 1: | ||
{{RF1Tutorial|trigger}} | {{RF1Tutorial|trigger}} | ||
[[RED Brushes#Portal Brushes|Portals]] are probably the most important part of your map. Primarily, a good use of portals will dramatically decrease your maps lag by reducing the amount of information that your computer has to remember/render. | [[RED Brushes#Portal Brushes|Portals]] are probably the most important part of your map. Primarily, a good use of portals will dramatically decrease your maps lag by reducing the amount of information that your computer has to remember/render. | ||
Latest revision as of 04:05, 16 November 2020
| Tutorial: Basic Portals Prepared by trigger. |
Portals are probably the most important part of your map. Primarily, a good use of portals will dramatically decrease your maps lag by reducing the amount of information that your computer has to remember/render.
Air Brush Portals
As far as this tutorial is concerned, portals are also useful for encasing room effects.
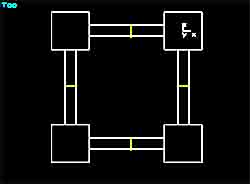
To begin with, make an air brush with these dimensions; H=40, W=40, D=30. Then create a smaller air brush with these dimensions; H=15, W=10, and D=20. Now copy and paste the smaller brush and arrange the smaller brushes as per the screen shot. Make sure you have snapped the brushes to the grid (Ctrl + G). If you haven't it may cause the room effect to leak into the other rooms. Then move the brushes into position using the M + Arrow keys, not your mouse.
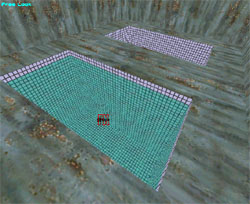
Go into Object mode and put a Room Effect in one of the smaller brushes. Press Ctrl + P and make the room effect a liquid type and adjust the height to a depth of 14m. Click OK. Now if you look in the Free Look viewport you will see that the other room beneath the main room is also filled with water. This is because the brushes have not been set to portals.
Go back into Brush mode and select the smaller brush with the room effect in it and press Ctrl + P and check the Is Portal flag. Rebuild your level. There you go, the water is only contained within the portal that has the room effect applied to it.
This should be the only time you use an air brush portal, ie to segment a room with a Room Effect in it.
Solid Face Brush Portals
The idea behind portals is that they should evenly segment your level into areas. That is, they should break it up into smaller bits so that your computer has less to remember. Evenly segmented portals are important. If the level is poorly segmented it can still cause lock ups or lag.
The next thing to note with portals is that you should not be able to see through two portals at once. This can cause one of two things. Your skybox will appear or you will get the hall of mirrors effect.
Creating the portals
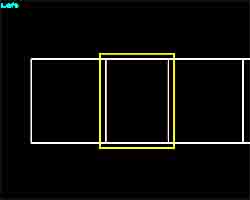
Go into Brush mode and create a Face type Solid brush. Don't worry about the dimensions. Now press the Stretch button and make the brush H=4.5 & W=3.5. Place the brush in the center of one of the corridors and make sure that it is covering the whole corridor, as per the screenshot. Now press Ctrl + P to bring up the properties box and check the Is Portal flag.
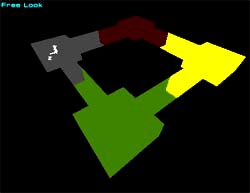
Copy and paste that brush and place it as per the first screenshot. Repeat this process until you have the four portals in place. Now you have four portals, therefore you also have four rooms. A way to see if the portals are working is to go to the top menu and select View and then Show Rooms in Different Colors. Your map should now show your different rooms in different colours. There may be two shades of green in your view. I changed the colour to make it easier to describe.


