Beginner Mapping (Daedalus)
| Tutorial: Beginner Mapping (Daedalus) Prepared by Daedalus. |
NOTE: This tutorial was originally posted Dec 28, 2001 by Daedalus on 3D Action Planet, which is no longer available. Given the age of the tutorial, some information may be obsolete.
Introduction
In this tutorial, we'll build the start of a Death Match map and learn the very basics of the following:
- Navigation
- Helpful Hot Keys
- Building Geometry
- Texturing
- Lighting
- Geometry Detailing
- Face/Vertex Editing
Getting Started
Be sure you installed Red Faction in the default directory, or at least one with no spaces. (Example: C:\games_that_rule\Red_Faction\)
Next make a shortcut for RED. Right click and drag it from your start menu and then select "Create shortcut". You'll be using that a lot.
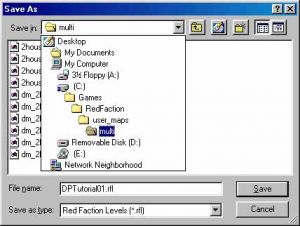
Open RED, and immediately save your file to the correct directory (the default is the WRONG directory). Press Ctrl+S to save, and move up 2 directories, and then to the "user_maps/multi" directory ( Save to C:\…\RedFaction\user_maps\multi ) Name the file "DPTutorial01.rfl"
If you have any problems or bugs that this tutorial doesn't address, you may want to check the DP FAQ as well.
You'll start out looking at a blue box in four different windows (or viewports). You'll see in the upper left corner of each viewport it says which direction that viewport is viewing from (right click on the label to change the viewpoint). You'll see in the viewports other than the "Free Look" window there's a red circle with a xyz tripod. That shows the position and direction of the camera in the "Free Look" viewport.
You move around all of the viewports with the number pad and the A and Z keys. If you're familiar with FRED(2) from FreeSpace2 (another of Volition's games), you'll get the hang of it real quick.
Whichever viewport your mouse pointer is over, that's the viewport you'll move in. Now move your pointer over the Free Look window, and experiment with these controls:
- A/Z - zoom in and out
- Numpad 8/2 - look up/down
- Numpad 4/6 - look left/right
- Numpad 1/3 - slide left/right
- Numpad +/Enter - slide up/down
- Numpad 7/9 - bank left/right
- Press Shift+C - Level view
When you are more familiar with RED, look at the hotkeys in the help file for more advanced camera movements, but for now you should only need the ones I gave.
In the other three views, the only hot keys you need are the ones to move up/down/left/right and zoom in and out, and these are the same as the ones for the perspective view (Free Look viewport).
Now you're asking, is it possible to move the view with the mouse? Well, yes it is, but as you'll see in this tutorial, I strongly suggest not using the mouse for most operations in RED. If you must use the mouse though, look at the help file included with RED.
Basic Geometry
Let's build our first brush. To build brushes, we must be in Brush mode. Look at the "Mode" dropdown in the upper left corner to find out what mode you in. You'll see that RED defaults to the Brush mode when it opens. Whenever you need to switch back to brush mode quickly, the hotkey is Shift+B.
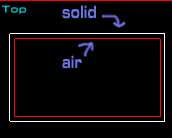
Your level starts out as a solid that extends to infinity. In order to make rooms, you have to subtract them from the solid. Now, that blue box that you've been looking at is your brush design "cutter". When you press the "Create Brush" button, that's what your new brush is going to look like. To cut out the inside of a room, it has to be an "air" brush.
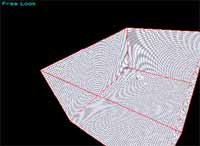
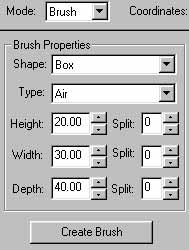
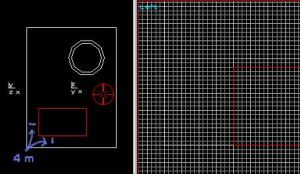
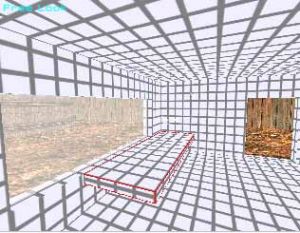
So let's cut out a main box for our level. Let's make it fairly big, so enter a height of 20, and width of 30, and a depth of 40 in the Brush Properties area, and that will adjust the size of the blue brush cutter (move the mouse over a viewport to see the updated size). Now press the Create Brush button. The blue box will turn red, meaning that that brush is currently selected. Press space to build the geometry and see what you've built in the Free Look window. Impressive, eh?
Ok, so that's NOT so impressive, so lets make something more. First, to get back the blue cutter, you must click on an open area in any of the viewports. When no brushes are selected, the cutter shows on top, so your brush did not go away. Notice it's the same size and in the same place as the brush you just made. That is useful for making many brushes that are very much alike.
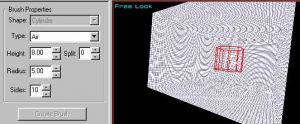
Now let's add a water tower in the middle of our level. Select "Cylinder" in the "Shape" dropdown and leave it as an air brush. Give it a height of 8, a radius of 5, and give it 10 sides - all which can be done in the same brush properties area as with the box. Now press Create Brush.
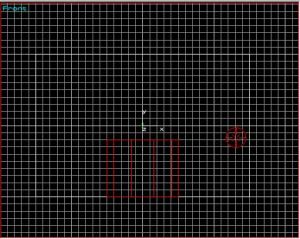
Opps! We forgot to put it on the ground! No problem, we'll move it down there. Since it's already selected, move your pointer over the left or front viewport (it's important to not make movements with your pointer in the 3d view, because it won't move your object on the grid), and hold M and press the down arrow key until the bottom is lined up with the bottom of the first brush (which should be down 6 times). Now press space to compile the map and see your new water tower.
See it? No? Ok, that's good. Because you weren't supposed to! That's because it's an air brush inside of an air brush. What we need is a solid brush to encase our little air brush. Now there's several ways to go about this next step, but we'll do the easiest for now. Deselect the brush (click on an open area) to get your cutter again. Since it's still the same size as the last one, just move it down to ground again like we did the brush, and give it a radius of 6, and make it a solid in the "Type" dropdown. Create the brush. Press space (or click the Build button in the "Brush Operators" area) to build the map.
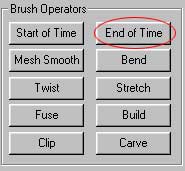
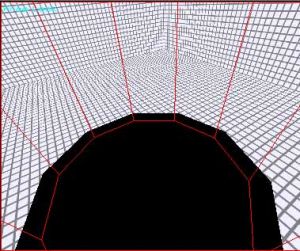
You will now see the tower in the center of the room, but if you fly into that tower in the Free Look view, you'll see that it's just a big solid, and the air brush inside didn't work! The reason is because the solid brush was made AFTER the air brush. If we would have been smart and built the solid brush first, the air brush would have had something to cut out when we created it. But RED saves the day, and you can just press the "End of Time" button (while the inside brush is selected (click on it in the Free Look view from the inside of the tower)) to fool the map into thinking we actually did make the air brush LAST. Press space then to see how that works. You'll have a big hole in the top, but that's ok for now.
The "Start of Time" works the same way, in that it makes that object as if it was the first one created, so every other brush will override it (which can give undesirable results sometimes). You can see the "time" (the order) in which a brush was created by looking in the text area on the bottom left (time is abbreviated as "t") when a brush is selected.
So back to our map, but before we do, save the map.
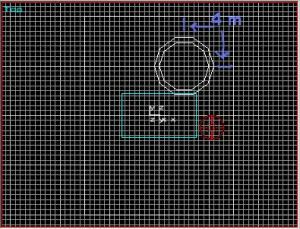
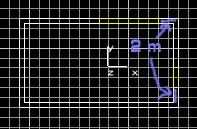
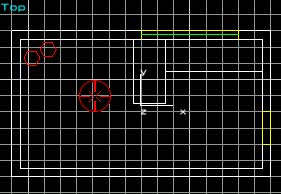
Now we need an office building nearby to keep close watch on the tower (uhh… this IS only a tutorial, Ok?). Since the tower will be in the way of our building, we need to move it again. Use the top view. Select both of the cylinder brushes by dragging a box around both. This should select only the 2 brushes, and not the main outside box. In reference to the top view, move the brushes up 10 meters (grid lines), and to the right about 5 (Should be a space of 4 meters on the top and right sides). Press space to rebuild the map.
We'll make the building simple. Deselect your brushes. Select a box brush cutter (in the "Type" dropdown). Make it a solid first this time. Resize it to 4.5 height, 15 width, 9 depth, and then create the brush. Try to move it to the ground from a side view. Notice that it won't go perfectly with the ground because of our weird resize height. What you must do is lower the grid size so that it can be moved precisely back onto the 1 meter grid. Press the "[" key twice or select .250 in the "Grid Size" dropdown on the top of the screen. Now there are many more grid lines on your screen, so they may have even gone away if you're zoomed out too far, so zoom in closer from a side view so you can see where to move the new brush to.
Now move it down to the ground (should have to press down 7 times). Now move it horizontally from the top view. Move it to where there's a 4 meter space on the left and bottom sides (completely opposite of the tower). You will still need to stay in the .250 m grid.
Now, we'll "carve" out the insides of this room (Note: this does NOT involve the rarely used "Carve" button). This time let's do it a different way. Since your building brush should still be selected, let's copy and paste a new one that will be exactly the same. Do this by pressing Ctrl+C then Ctrl+V. You now have 2 alike brushes in the same exact place, so you MUST move or change it now or else you may start to get DBS (double brush syndrome). Without selecting/deselecting anything, click on the "Stretch" operator in the Brush Operators area. A little window will come up, asking for new brush dimensions, so make the new ones to be a height of 4, width 14, depth 8. Now make it an air brush, and center it inside of the other brush. Since it can't be centered by moving it on the 1 meter grid, be sure the grid size at .50 or .250 (Press "[" to lower grid size), then center it from the top view. Lastly, build the map (space).
Note that after a brush is created, only the Type (air or solid) can be changed in the brush properties area. You have to click the "Stretch" button if you want to change its dimensions (or do face or vertex editing which we'll discuss later).
That's our VERY basic geometry for this map.
Let's go ahead and try it in game real quick. We need to move our Player Start though. Go to object mode (Shift+O) and move the 3d camera to where you want the player to start, and double click "Player Start" in the list on the left. Save again. In the menus, select File > Create Level Packfile. Then press F7 to play. The game should run, if not, be sure you saved it in the correct directory, and you created a packfile.
Textures
This is normally not the order I would create a map (doing textures now), but for your first time, it's easier to see what's going on without that default texture.
Go to texture mode (Shift+T or select Texture mode in the "Mode" dropdown list). Now, in the 3d view (Free Look), select the main outside wall. You know when it's selected when its borders are red. We want to change all the textures on this brush though, so press Shift+S to select all of those faces.
In the texture options on the left side of the screen, click on "Browse" to find a good texture. You may want to increase the display size to 128x128 to see them better. Select "Floor - Misc" for the folder, and double click the "wood_floor01" texture. Now press the "Ok" button.
Now that you have some faces selected, and the texture we want, we can apply the texture by clicking on "Apply". If you don't see the textures apply immediately, press "Space" and they will show.
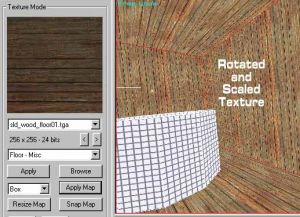
Press the "Apply Map" button to apply the textures as a box (as indicated by the dropdown list to the left). That will size them properly in most cases, but this time let's scale the texture a little bigger, and rotate it so the lines are vertical. You can scale by holding down "S" and pressing the down arrow key (to scale larger) or the up arrow key (to scale smaller). You can rotate it by holding "R" and pressing the left or right arrow keys. Rotate 90 degrees (or the default of 15 degrees 6 times). The rotational degrees can be changed by pressing either "Shift+[" or "Shift+]" or with the dropdown on top of the screen. Press space if the textures did not update immediately to see how it looks.
Now, normally you wouldn't have a roof with wood like that, but we'll fix that in a later tutorial with a skybox. For now, let's just change the floor texture to something else. Hit "Browse" again, and go to the "Floor - Rock" folder. Select the dirt02 texture, and apply it.
You can also just select your texture right from the area on the left without going through the browse window. Do it whichever way is easiest for you.
So that's the basics of texturing. You can texture the water tower and building as you like, or use the textures I used: Building walls: cem_bunker01.tga Building roof: cem_dark_asphalt01.tga Water tower inside and out: mtl_darkdrippy02.tga (scaled smaller once)
Another thing to note is that, for example, when selecting the textures for the water tower, select one face on the inside and one on the outside, and then press Shift+S to select all the faces for both of those brushes.
Lighting
Now we'll quickly show how to light the map. Since we're not too worried about looks right now, we'll just make them functional.
Go to Object mode (Shift+O), and move the 3d camera where you want to place a light. Double click "Light" in the list on the left, and when you zoom out a little in the 3d view, you'll see the light you just placed. It will still be selected, so you can edit its properties now. Press Ctrl+P to access the Properties. Change its range to 35, and deselect the "Shadow Casting" Light Flag (to keep this tutorial map simple).
Now, most lights are one of the few things that I'll move with a mouse and not arrow keys. You can reposition it by holding "M" and left clicking/dragging with the light selected. Do this in one of the orthogonal views (those other than the Free Look view). Center it from the sides, and position it around 2 meters from the ceiling.
You can change its color if you wish, but white probably looks best with only one light like this. Now, to see what the light looks like in RED, you have to calculate maps and lights. This can be done through the menu with Level > Calculate Maps and Light. Or with the hotkeys "L", "Shift+L". At the time of this writing, there is a bug in RED with the lights, so to get the lights to work, you must hide the lights, show the lights, then calculate maps and light. The hotkeys are in sequence, W, Shift+W, L, Shift+L. Remember that sequence well, because you'll need it a lot.
Details - Doors and Windows
Now let's add some details to our building. We still need a door and a window, and something inside the building.
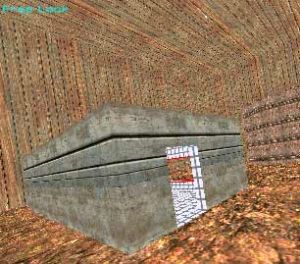
First we'll make the door. Go back to brush mode (Shift+B), and set the dimensions for the brush cutter to 3 high, .5 wide, and 2 deep. Move this brush to the right side of the building (from the top perspective), and about 2 M from the bottom side (again, speaking from the top view) and level it with the ground (you'll probably need to adjust grid sizes to get it to line up nicely). Make sure it's an air brush and click "Create Brush". Immediately press Ctrl+P and click the "Is portal" tag, since it's a door, and that's where portals should be used. When not selected, portal brushes will show in yellow. Now press space to see your new door.
Now let's make a window. We're going to do the same exact thing as with the door, only a little different dimensions, and not level with the ground. Make it 2 tall, 6 wide, and .5 deep. Place it on the side facing the water tower, and about 2 meters from the side with the door, and 1 meter from the ground. Don't forget to make sure it's an air brush, and you set it as a portal. Build the map again (Space).
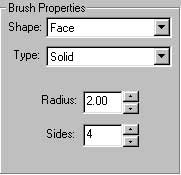
Now we'll make breakable glass to go with that. For this, we must create a 4-sided face brush, so deselect your current brush and change the cutter type to a face, and make it a solid. It should already be in a good spot from the last brush, so we'll just have to change the size a little. But face brushes are weird, and are set by a radius, so just create the brush at any radius, and stretch it to the right size after creating it.
Press the "Stretch" button and set the dimensions to the same as the window frame (h=2, w=6). If you try to line the new face up with the window area, you'll probably see that it's not going to line up perfectly no matter how small you make the grid. Now we'll learn one of the most useful hotkeys RED has. Press Ctrl+G to snap the brush to the grid. Now make whatever adjustments are needed.
While the face brush is selected, press Ctrl+P and set the "Is detail" flag, and give it a life of 100 (Do not set these at the area of the screen on the left). Then add a glass texture to the face. Be sure to press "Shift+S" to select both sides. I used gls_diamond01.tga in the "Glass" folder for the texture. Build the map, and you should see your glass.
Let's add a desk too. We'll make it relatively simple, and just attach it to the wall. So go back to the brush cutter, and make it a solid box. Give it the dimensions of h=0.25, w=6, d=2. Move it in the upper right corner (from the top perspective) of the building. Look on one of the side views and place it right under the window. Build the map to see it.
Let's add more to the desk so copy and paste the one we just made (Ctrl+C, Ctrl+V). Move it towards the center of the building and rotate it 90 degrees (hold R and press the arrow keys over one of the orthogonal views to avoid rotating in 3 axes. Just mess with the keys until you get it to rotate in the right direction (Page Up/Down work too)). It's a little long, so let's shorten it. Press the "Stretch" button, and shorten it to 4m.
Now we'll add a couple barrels in the corner that we'll later blow up. :) I'm just going to say quickly how to do this one, as you should be quite familiar with brushes now. Make your first one and use a solid cylinder with 6 sides. Make it 1.5 meters tall, and a radius of 0.5. Then just copy and paste the second one. Here is another one of those rare situations where I suggest using the mouse to move the brush. We don't want the barrels sitting in the corner in a too uniform fashion, so move them around in the corner a little bit from the top view.
Since you should be familiar enough with texturing, I won't walkthrough that now. You can leave those as the default texture and move on to the next step if you want to, or you can texture the inside of the building now. If you do, the UV unwrapper (UV Map button in texture mode) is useful for getting things like the desk and barrels to line up nicely. The UV unwrapper is pretty intuitive.
Vertex and Face Editing
We'll now quickly learn how to use the infamous Extrude operator and do the invaluable Vertex level editing. Both go hand in hand, so we'll now start with putting a round cover on our water tower.
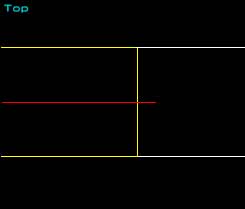
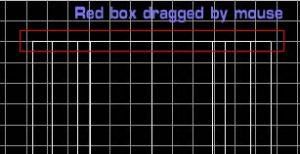
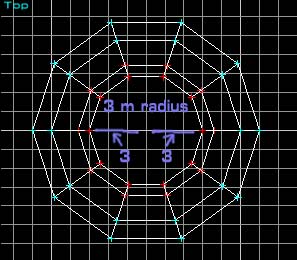
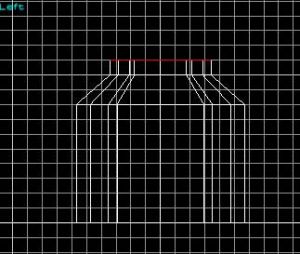
Move all your views towards the tower. Go to Face mode (Shift+F). From one of the side views, select the top faces of both brushes by dragging a box around the them (see screenshot). Press the "Extrude" button in the Face operators, or just Ctrl+E for short. This will "extrude" the faces x meters (x = grid size). You can now edit these new faces and vertices without affecting the vertices you just extruded FROM. This will make more sense as we work with vertices more.
Now go to vertex mode (Shift+V). In either of the side views, drag a box around all the vertices you just created on the top to select them (similar to selecting the faces). Select only the top row. Now, depending on what your grid size is, you'll have to move it different amounts, but just move the vertices until they are 2 m above the other ones (move them from one of the side views). Now we can scale them down and "close the circle". We can use the "S" key to make the vertices taper. Hold S, and press the down arrow key until the radius of the inside vertices is about 3 m. Now let's extrude these faces.
Go back to face mode and select the top two faces. Extrude them (Ctrl+E), and move the faces until they are 1 meter above the other vertices. Go back to vertex mode, and scale them down until the inner vertices have a diameter of 2. Press space to build. We'll leave the top open for now.
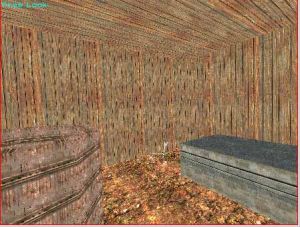
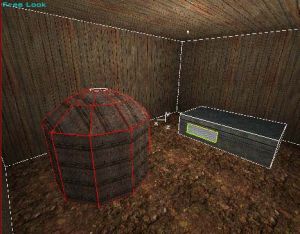
Now just texture the extruded faces and it should look like this:
Build the geometry one last time, then calculate lights and maps (W, Shift+W, L, Shift+L), then save. Create a packfile, and then play the game (F7)
This is not a complete DM map yet, but we'll finish it in the intermediate tutorial. Please give me feedback on if this tutorial has helped you. Thanks. (My email is daedalus@3dap.com)
