Adding a Moon to a Skybox: Difference between revisions
No edit summary |
No edit summary |
||
| Line 14: | Line 14: | ||
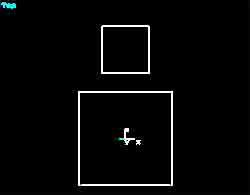
[[File:Skymoon_2.jpg|Above - Free Look and Top views]] | [[File:Skymoon_2.jpg|Above - Free Look and Top views]] | ||
Go back into [[RED User Guide#Texture | Go back into [[RED User Guide#Texture Mode|Texture mode]] and select the Face brush. Then select the bluemoon.tga from the Sky folder. Apply it and then Apply map. You will probably have to use the UVunwrap to make the moon cover the Face brush correctly. | ||
Rebuild your level and now you have a moon within your starfield. | Rebuild your level and now you have a moon within your starfield. | ||
Latest revision as of 03:17, 6 November 2020
| Tutorial: Adding a Moon to a Skybox Prepared by trigger. |
NOTE: This tutorial was originally posted on redtechnologies, which is no longer available.
There are a few extras you can add to your skybox to make it look more real. Surfaces such as suns, moons, clouds and stars. A problem with these effects is that it can sometimes be hard to position these objects in relation to your level. Just play around with it to get it how you want it to look.
Create an air brush for your main room. Dimensions h=20, width=20 and depth=20. Now create an air brush for your skybox. Dimensions height=4, width=4 and depth=4.
Go into Texture mode and select the starfield01.tga from the Sky folder. This is one of the easier Sky textures to work with. Apply it and then Apply map to all the surfaces of the skybox air brush.
Go back to brush mode and make a Solid Face brush with a 2.0 radius. Press Ctrl + P and set the Face brush to Is Detail. Move it into position as per the screenshot.
Go back into Texture mode and select the Face brush. Then select the bluemoon.tga from the Sky folder. Apply it and then Apply map. You will probably have to use the UVunwrap to make the moon cover the Face brush correctly.
Rebuild your level and now you have a moon within your starfield.
Go into Object mode and add a Room Effect to the skybox. In the properties change the Effect Type to Sky Room. Go back to Texture mode and select the ceiling and/or the walls of the main room and press Ctrl + P and check the Show Sky flag. You should be left with just the floor showing. If so, thats it, your starfield with a moon is done. Calculate the lighting and maps (W, Shift+W, L Shift+L), Save, Create a Packfile and then go test your level.
Add as many effects to your skybox as you like. As previously stated, sometimes it can be hard to position these effects, but a good dose of trial and error goes a long way.

