Cutscene Tutorial: Difference between revisions
Beatonator (talk | contribs) No edit summary |
Beatonator (talk | contribs) No edit summary |
||
| Line 48: | Line 48: | ||
|} | |} | ||
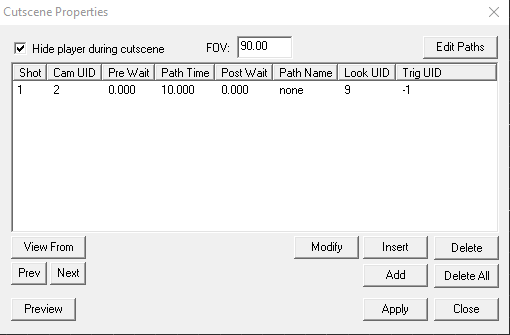
This will use the '''Camera''' object with a UID of 2, will be active for 10 seconds and be static as no Path name has been specified. It will also follow the object with a UID of 9. | This will use the '''Camera''' object with a UID of 2, will be active for 10 seconds and be static as no Path name has been specified. It will also follow the object with a UID of 9. | ||
Once done, click "OK", this will add the camera to the cutscene. | |||
{| class="wikitable" | |||
|+ | |||
|- | |||
|[[File:img_camera_add02.png]] | |||
|- | |||
|} | |||
If desired you can repeat the above process with multiple different '''camera''' objects, which will allow the cutscene to step through the added cameras. | |||
when you have added the required cameras, make sure to click "Apply" before clicking close. Otherwise it will not save the Cutscene. | when you have added the required cameras, make sure to click "Apply" before clicking close. Otherwise it will not save the Cutscene. | ||
Revision as of 14:55, 4 January 2021
| Tutorial: Cutscene Tutorial Prepared by Beatonator. |
This page will detail the various settings we know about the Cutscene Creation and a basic guide on creating Camera paths.
THIS PAGE IS A WORK IN PROGRESS!
Cutscene Information
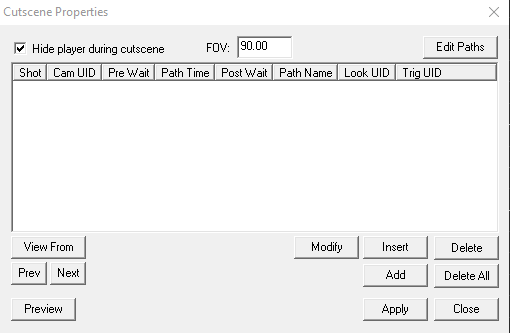
Cutscene Properties

|
Camera Properties
- Camera UID - This is the UID of the Camera that you have placed.
- Pre Wait - This is how long the camera is active prior to beginning any Camera Path designated.
- Path Time - This setting dictates how fast the camera travels the camera path. (Use this value for a static camera)
- Post Wait - This is how long the camera remains active after the camera path has been traversed.
- Path Name - This property is the name of the cutscene path you wish your camera to travel along. (Leave this as "none" for a static camera)
- Look UID - This property makes the camera focus/follow on a specific object.
- Trigger UID - TBD... Unsure, possibly used to trigger another event?
Creating a Basic Cutscene
To create a basic Cutscene requires 3 objects.
- Camera Object
- Cutscene Event Object
- Trigger Event Object
To begin with, select the Trigger Event object followed by the Cutscene Event Object and link them together (The hotkey for this is K, or you can do this via the object's properties window).
Set the Trigger Event's properties as required. Paying close attention to the amount of times it can reset and also the delay between resets.
Once done, select the Cutscene Event Object and open the properties window: (Note: When this window is open the main RED viewports "soft-lock" so you have to manually click to activate each viewport rather than mouse-over)
An individual cutscene event is made up of 1 or more camera objects. To add your first camera, click the "Add" button, then complete the Camera Properties window. An example is below:

|
This will use the Camera object with a UID of 2, will be active for 10 seconds and be static as no Path name has been specified. It will also follow the object with a UID of 9. Once done, click "OK", this will add the camera to the cutscene.

|
If desired you can repeat the above process with multiple different camera objects, which will allow the cutscene to step through the added cameras. when you have added the required cameras, make sure to click "Apply" before clicking close. Otherwise it will not save the Cutscene.