Nanoforge basics
| This page is part of the Red Faction: Guerrilla Editing Knowledgebase | |
| Editing Main Page |
This page goes over how to install Nanoforge and it's basic features. This is for quickly familiarizing yourself with it's features. More advanced explorations of each feature will be placed in separate articles when necessary.
Installation
Download
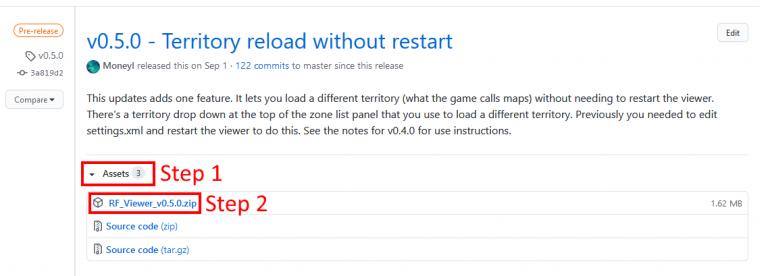
Nanoforge releases are posted on github. Multiple releases will be listed. You should always download the most recent release. To download it, look for the ▸Assets button(1), click it, and download the first zip file listed under it(2).
Install
Installing Nanoforge is simple.
- Unpack the zip file you downloaded.
- In the unpacked folder look for
Settings.xml. Make sure<DataPath>is set to the path of your RFG data folder. - Run Nanoforge.exe.
Features
This section gives a quick rundown of each of Nanoforge's features.
Projects
Nanoforge uses projects to track edits made to game files. The idea is to use a single project per mod. At the time of writing this article only texture editing is supported, but all future editing features will make use of the project system to track edits. You must create a project to use Nanoforge, even if you don't plan on editing anything. To create a new project click New project in the startup page. Fill out all the info on the popup and click Create. Below are each of the fields to fill in:
- Name: The name of the project. Used to name the project file and as the name in any modinfo.xml files it generates.
- Path: Path to the folder that the project should be created in.
- Description: Description of what the mod is. Used in the description field of modinfo.xml.
- Author: Author(s) of the mod. Used in the author filed of modinfo.xml.
- Create project folder: If unchecked then the project files are placed directly in the folder chosen for path. If checked a folder with the entered name will be created in that folder.
File explorer
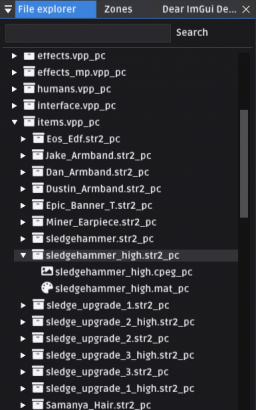
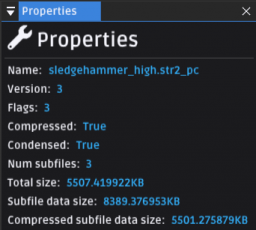
The file explorer lets you view the contents of vpp_pc and str2_pc files without extracting them manually. You can double click supported file formats like textures to open them. If you single click a vpp_pc or str2_pc file it will expand to show it's contents. Extra info about the file will be shown in the properties panel for some files when single clicking them.
Search
You can use the search bar to limit which files are shown in the file explorer. By default it will only show files with names that contain the search term. You can also use some special characters to specialize your search behavior:
- Start your search with *: Will only show files with names that end with whatever comes after *
- End your search with *: Will only show files with names that start with whatever comes before *
Properties panel
The properties panel sometimes will show additional info about files selected in the file explorer. It also may be used by other UI panels to show additional info. For example, it can list object properties when viewing territories (see map viewing section below).
Textures
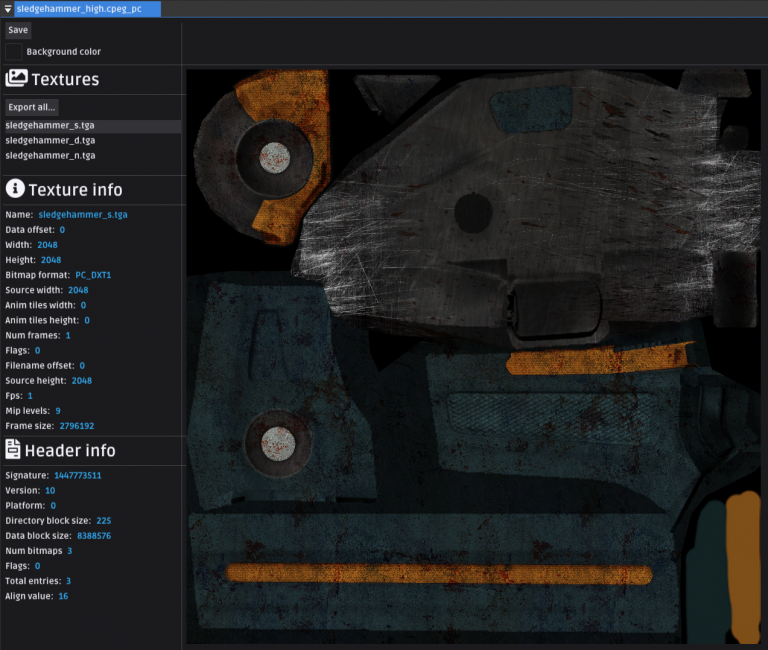
You can open texture files by double clicking them in the file explorer. Textures are split into two files. Either a cpeg_pc and gpeg_pc file pair or a cvbm_pc and gvbm_pc file pair. You can double click any of these to open a texture. A single RFG texture file can contain multiple textures, which we'll refer to as subtextures. Info about the selected subtexture will be shown below the subtexture list.
Above is an example of what you might see if you open a texture file. On the sidebar to the left there a few things, in order:
- The subtexture list. Click on one to see more info about it below.
- Texture info. This is info about the selected subtexture.
- Header info. This is general info about the cpeg/cvbm file.
Exporting textures
Textures can be exported to files you can edit with common image editors like Paint.NET, GIMP, or Photoshop. Currently textures can only be exported as .dds files. You can export single subtextures by right clicking one of them and clicking Export.... You can export all subtextures at once with the Export all... button.
Editing textures
Textures can be edited by imported textures you've edited externally. Currently it can only import .dds files. You do this by right clicking a subtexture, clicking Replace... and selecting the file you want to replace the subtexture with. Once you do this it's critical that you press the Save button above the subtexture list to save your edit. This edit will be automatically saved to your current project when you click Save.
Meshes
Nanoforge supports viewing and exporting .csmesh_pc (static mesh) and .ccmesh_pc (character mesh) files. Just like textures, meshes consist of two files. Every csmesh_pc file is paired with a gsmesh_pc file, and every ccmesh_pc file is paired with a gcmesh_pc file. You can click any of them to open a mesh. When you open a mesh you'll first see a blank space. Meshes are loaded on a background thread so it may take a few seconds for the mesh to be loaded and for it's textures to show up. Before its textures are found or if the textures cant be found you might see textures from previously loaded meshes applied to the mesh.
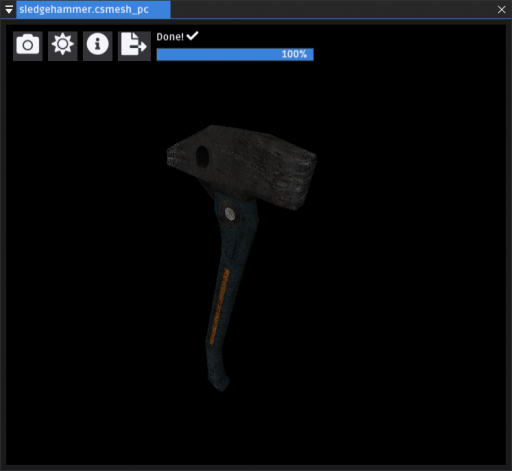
Above is what you might see if you open a mesh file. There's a few parts of the UI to note, in order:
- The camera button. This lets you control camera settings like speed and location. You can move the camera by holding down the right mouse button and using WASD to move around. If this doesn't work try left clicking on the mesh 3D view. Only the most recently selected mesh reacts to camera controls so if you have several open it'll only move one camera.
- The scene button. This has some rendering settings for the mesh such as scale and lighting color/intensity.
- The info button. This shows some additional info about the mesh such as vertex format, and submeshes. For many meshes the submeshes are lower detail versions of the mesh so by default they'll be hidden. Submeshes are loaded one by one so they may not all be visible until loading is finished.
- The export button. This lets you export the mesh and it's textures to a .obj file, which can be imported into tools like blender.
- The status bar. This shows the loading status and percentage. It will show
Done! ✓once loading is complete.
Exporting meshes
To export a mesh:
- Wait for it to finish loading. The status bar will show
Done! ✓and 100%. - Click the export button. Top left of the document, button furthest to the right.
- Select a folder to export the mesh and it's textures to and click
Export. This will export the mesh as a .obj file, and export it's textures as .dds files. You can import the obj and it's textures with blender. Note that if you use the built in windows 10 3D viewer to open the obj that it won't show textures as it doesn't support dds.
A single obj and mtl file will be outputted for each submesh. For example, if you exported kobel.ccmesh_pc (admiral kobel), you'd get 3 obj and 3 mtl files. The first one kobel_0.obj is the first submesh. In this case the first submesh is the highest quality one and the other two are lower detail ones used by the LOD (level of detail) system when you're far away from the mesh.
Camera movement
To move the camera hold down the right mouse button over the 3D view and use WASD to move around. Holding down shift while moving will cause the camera to move faster. Pressing Q and E will move the camera directly up and directly down respectively.
Mod packaging
Once you're done editing textures you can use Nanoforge to repack the editing files and generate a modinfo.xml for you. To do this, simply click File > Package mod on the main menu bar. Once it's done go to the "Output" folder inside your project folder to see the modinfo.xml and any files that it relies on. These are ready for use with the re-mars-tered mod manager. RFG steam edition support will come in a future update.
Map view
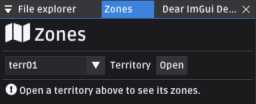
Nanoforge has partial support for viewing maps like the main campaign map. We'll be referring to them as territories as that's how RFG groups together many zones. See RF:G Map organization for more details on how RFG maps are structured. To open a territory find the panel labelled Zones. If you don't see it you may have to make it visible by clicking Tools > Zone list on the main menu bar. You can open a territory by picking one from the drop town at the top of the panel and clicking Open. Terr01 is the main campaign map territory.
A new document should appear when you open a new territory. Camera movement is the same as the mesh viewer. See camera movement. Terrain is loaded in the background so you'll see separate blocks of terrain pop into view as they load. Bounding boxes are drawn for zone objects. Note that this is broken in version 0.6.0 and will be fixed in 0.7.0. With a territory open you should see new information on the zone panel and the zone objects panel. You can dock panels by clicking and dragging on their titles. It's recommended that you dock the zone object list below the zone list so you can see both at once.
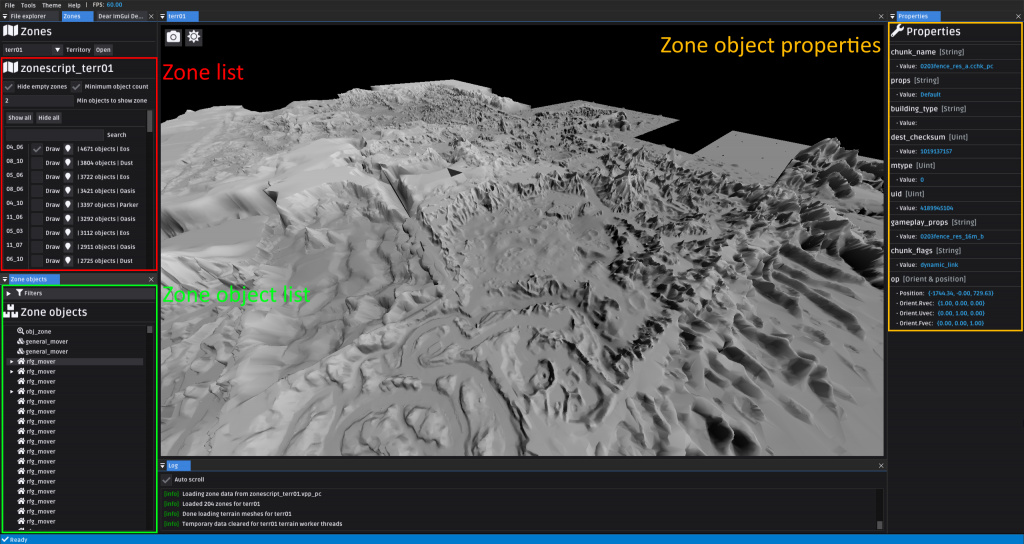
Below is an annotated image of information you can view about territories plus descriptions for each annotation.
- First, in the top left is the zone list. Territories are made up of one or more zones which in turn have many zone objects. Click a zone to see its object in the zone objects panel (bottom left). By default the zone with the most objects is selected. In this case that's
04_06. Note that each zone corresponds to a rfgzone_pc file. So, for example,04_06is really terr01_04_06.rfgzone_pc. - Next, bottom left is the zone objects list. This lists the objects inside the selected zone. Click an object to see its properties in the properties panel. Some objects have child objects, denoted by having a triangle in front of their name which you can click to expand them. You can filter objects by type inside the filters header. By default some very common objects like navpoints are hidden.
- Finally, in the top right is the properties panel. This shows the properties of the selected zone object.
